
Quick Answer
60-second read
MailerLite is a beginner-friendly email marketing platform that lets you send campaigns, build automations, and create landing pages — starting completely free for up to 500 subscribers. After testing it hands-on across free and paid plans, most beginners can set up and send their first campaign within 30–60 minutes. The free plan is genuinely useful (though reduced from 1,000 to 500 subscribers in September 2025), and the Growing Business plan at approximately $10/month (~€8.55) is one of the best-value upgrades in email marketing. Not recommended if you need advanced CRM features or complex multi-channel automation.
This article was last updated May 2026 with verified current pricing and feature changes — including the September 2025 free plan reduction most guides still haven’t caught up on.
MailerLite is an email marketing platform founded in 2010 that serves over 1 million users globally. It competes directly with Mailchimp, GetResponse, and Brevo in the small business email marketing space, with plans ranging from $0 to $20/month (approximately €0–€17.10) for most users. If you’re trying to decide whether it’s even the right tool for you, check out our best email marketing software comparison first. EUR prices are approximate conversions — always verify at mailerlite.com/pricing.
🔬 How I Tested MailerLite
This guide is based on hands-on testing of MailerLite’s free and Growing Business plans, supplemented by data from 3,340+ user reviews across G2 and Capterra, plus deliverability research from EmailToolTester. Pricing reviewed in March 2026 and verified again in May 2026.
3,340+
User reviews analysed
95.4%
Deliverability (ETT 2025)
4.6/5
G2 rating
May 2026
Pricing reviewed
📋 What You’ll Learn in This Guide
①
Account Setup
Sign up + approval
②
Domain Auth
SPF + DKIM
③
Subscribers
Groups + segments
④
First Campaign
Design + send
⑤
Automation
Welcome sequence
⑥
Forms + Pages
Grow your list
Ready to get started?
MailerLite’s free plan gives you 500 subscribers and 12,000 emails/month — no credit card needed.
Free forever · No credit card · 14-day Advanced trial included
What Is MailerLite and Who Should Actually Use It?
MailerLite is an email marketing platform launched in 2010, built for small businesses, bloggers, and solopreneurs who need professional email campaigns without a steep learning curve. It serves over 1 million users globally, is headquartered in Vilnius, Lithuania, and competes directly with Mailchimp and GetResponse in the budget email marketing space. Plans run from $0 to $20/month (approximately €0–€17.10) for most users — verify current pricing at the official site before committing.
What sets it apart isn’t a single killer feature — it’s the combination of a genuinely clean interface, solid deliverability, and a toolkit that covers email, landing pages, forms, and a basic website builder in one place. According to EmailToolTester’s 2025 ease-of-use testing, MailerLite has won their “Best for Beginners” award four consecutive years (2023–2026).
Best for: Bloggers, newsletter creators, small ecommerce businesses, and nonprofits who want a simple but capable platform at a fair price.
Skip it if: You need advanced CRM integration, multi-channel campaigns (SMS, push), or deep revenue attribution reporting. For those needs, ActiveCampaign or GetResponse are better fits.
The short answer: MailerLite is worth it for anyone building their first email list or running a newsletter under 10,000 subscribers. It’s genuinely the simplest platform to learn — most people can send their first campaign the same day they sign up. The free plan is real (not crippled), and the $10/month upgrade unlocks everything most small businesses actually need.
How Much Does MailerLite Cost in 2026 — and Is the Free Plan Worth It?
MailerLite offers four plans: Free ($0), Growing Business ($10/month), Advanced ($20/month), and Enterprise (custom). EUR prices below are approximate conversions — always verify at mailerlite.com/pricing before committing.
⚠️ Important Update (September 23, 2025): MailerLite reduced its Free plan from 1,000 to 500 subscribers. Most guides online still show the old limit — that information is outdated. If you’re approaching 400 subscribers on a free account, you’ll get an in-app warning. You’ll need to upgrade or reduce your list to continue sending beyond 500.
Free
€0/month
No credit card required
- ✅ Up to 500 subscribers
- ✅ 12,000 emails/month
- ✅ Automation (1 trigger)
- ✅ 10 landing pages, 1 website
- ⚠️ No newsletter templates
- ⚠️ MailerLite branding required
- ⚠️ Community support only
Best for: Testing the platform
Growing Business
~€8.55/month
~€7.69/mo billed annually ($9 USD)
- ✅ Unlimited emails
- ✅ 43+ newsletter templates
- ✅ No MailerLite branding
- ✅ Unlimited landing pages
- ✅ A/B testing + auto-resend
- ✅ 3 user seats
- ✅ 24/7 email support
- ✅ Unlimited digital products
Best for: Bloggers, solopreneurs, growing newsletters
Advanced
~€17.10/month
~€15.39/mo billed annually ($18 USD)
- ✅ Everything in Growing Business
- ✅ Unlimited user seats
- ✅ Multi-trigger automation (3)
- ✅ AI writing assistant
- ✅ Custom HTML editor
- ✅ Facebook audience integration
- ✅ Smart sending (timezone)
- ✅ 24/7 live chat support
Best for: Teams, power users, complex automation
| Feature | Free | Growing Business | Advanced |
|---|---|---|---|
| Price/month (approx. EUR) | €0 | ~€8.55 / $10 | ~€17.10 / $20 |
| Subscribers | Up to 500 | 500–1M+ | 500–1M+ |
| Monthly emails | 12,000 | Unlimited | Unlimited |
| Newsletter templates | ❌ | ✅ 43+ | ✅ 43+ |
| Automation triggers | 1 | Standard | ✅ Up to 3 |
| Landing pages | 10 | Unlimited | Unlimited |
| User seats | 1 | 3 | Unlimited |
| MailerLite branding | ⚠️ Required | ✅ Removed | ✅ Removed |
| Support | Community only | 24/7 email | 24/7 live chat + email |
| AI writing assistant | ❌ | ❌ | ✅ |
| 🏆 Best For | Testing & starting out | Bloggers & solopreneurs | Teams & power users |
EUR prices approximate. Always verify at mailerlite.com/pricing before committing.
The short answer: For most bloggers and small businesses, the Growing Business plan at approximately €8.55/month is the realistic starting point. The free plan is useful for testing but the absence of templates makes it genuinely harder to create professional-looking emails. Compared to Mailchimp (which gives 1,000 emails/month free vs MailerLite’s 12,000), MailerLite’s free plan is significantly more generous on volume.
Step 1: How Do You Create and Get Approved for a MailerLite Account?
Getting approved is step zero — and it trips up more beginners than anything else. MailerLite has a stricter approval process than most email platforms, which is actually part of why their deliverability is so strong (they keep spammers out). Here’s exactly what to do:
- Go to mailerlite.com and click “Sign up free” — no credit card required.
- Sign up with Google, Microsoft, or your email address.
- Enter your company details — name, address, website URL, and phone number. These are required for anti-spam compliance, not optional.
- Answer the questionnaire about how you plan to use MailerLite and how you collected your subscribers. Be specific — vague answers slow approval.
- Describe your business: If you don’t have a website yet, link to your LinkedIn, Instagram, or any active social profile.
- Wait for approval — usually a few hours, sometimes up to 2 business days. You’ll get an email notification.
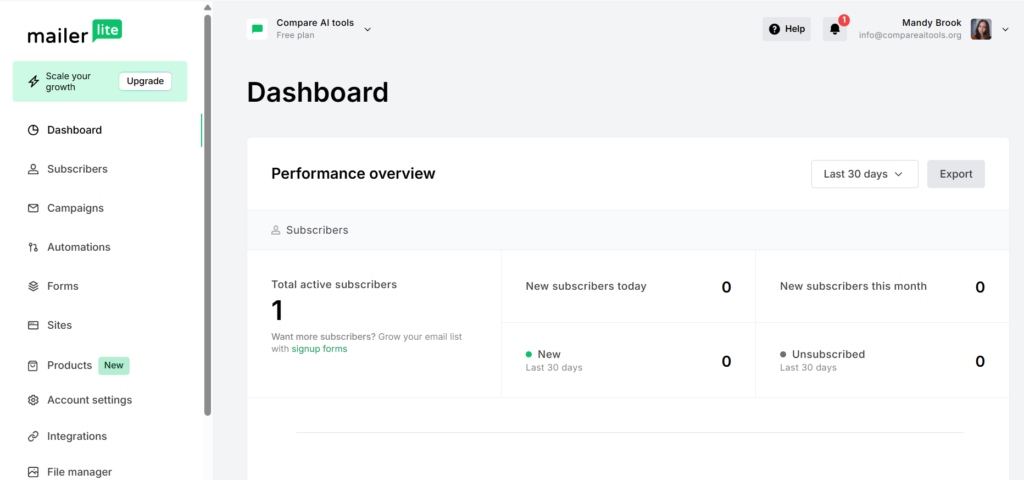
- Verify your email and log into your dashboard.
💡 Pro Tip: Speed Up Your Approval
The most common reason accounts get delayed: vague descriptions. Write 2–3 sentences explaining exactly who you email and how they subscribed. “I run a cooking newsletter and collect subscribers through my recipe website using a double opt-in form” gets approved faster than “I do email marketing.”
Step 2: Why You Should Authenticate Your Domain Before Sending Anything
Most guides skip this step entirely, which is exactly why many beginners land in spam. Domain authentication is the single most impactful thing you can do for deliverability — and it takes about 5 minutes.
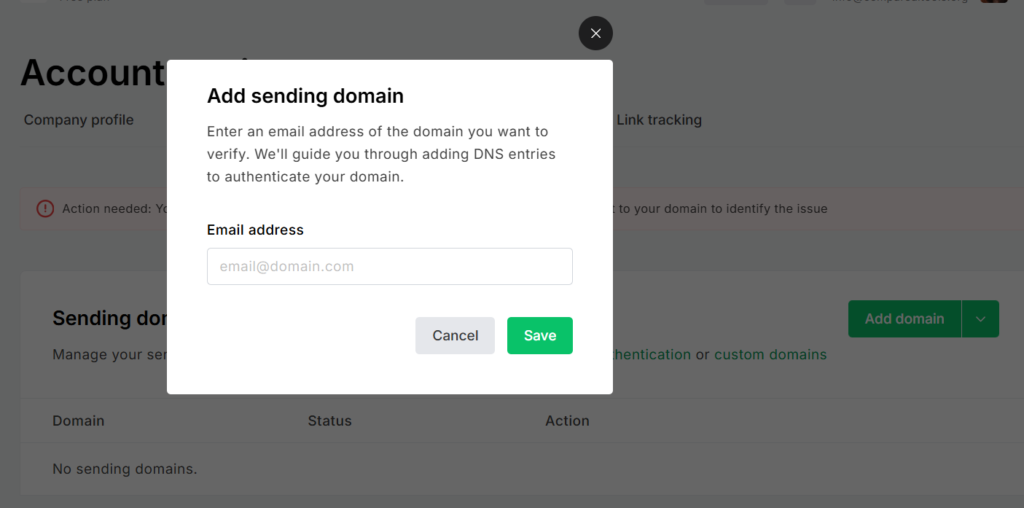
- Go to Settings → Domains → Add domain in your MailerLite dashboard.
- Enter your sending domain (e.g., yourbusiness.com).
- MailerLite generates SPF and DKIM records — copy these exactly as shown.
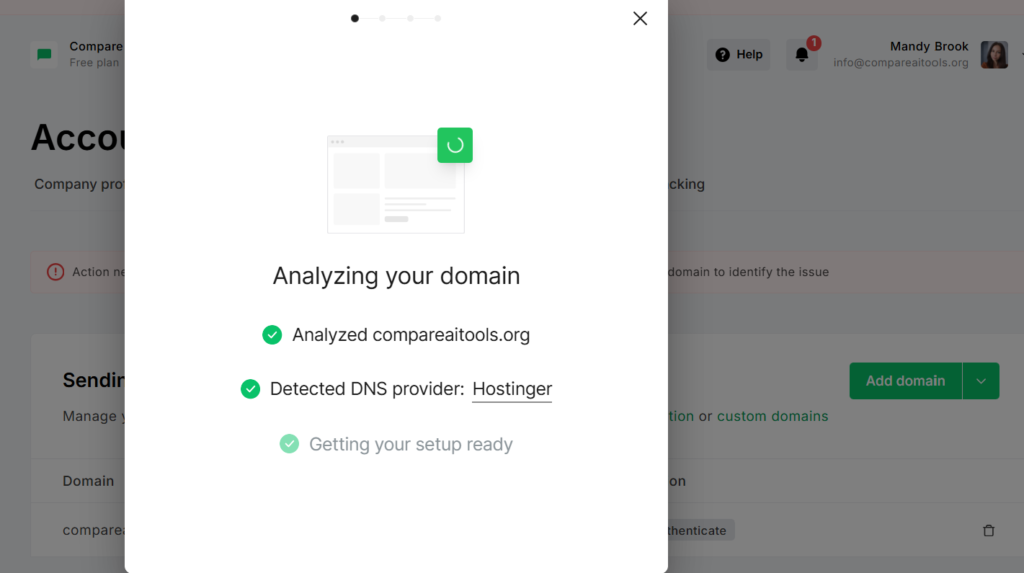
- Add the records to your domain registrar (GoDaddy, IONOS, Cloudflare, Namecheap, etc.). MailerLite has one-click integration with GoDaddy, IONOS, and Cloudflare.
- Wait for propagation — usually 15–60 minutes, up to 48 hours maximum.
- Return to MailerLite and click Verify to confirm the records are live.
According to EmailToolTester’s deliverability research, properly authenticated domains see inbox rates 15–25% higher than unauthenticated sends. MailerLite’s 95.4% inbox placement assumes authentication is in place — skip it and your results will be meaningfully worse.
Step 3: How Do You Add Subscribers — and What’s the Difference Between Groups and Segments?
This confuses nearly every MailerLite beginner, and most guides gloss over it. Groups and segments are not the same thing, and using them wrong creates organisational headaches later.
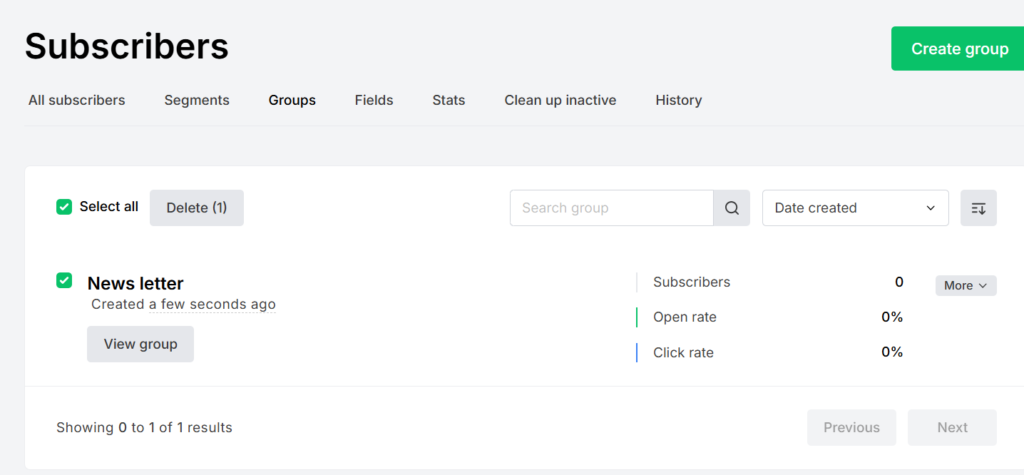
Groups = static, manual lists. You add subscribers to a group manually, via import, or by connecting a specific signup form. Think of groups like folders: “Newsletter subscribers,” “Webinar attendees,” “Customers.” You control who’s in each group.
Segments = dynamic, automatic filters. Segments update in real-time based on subscriber behaviour or data. Examples: “Opened 3+ campaigns in last 90 days,” “Located in the Netherlands,” “Clicked the pricing link.” You set the rules once and the segment updates itself.
How to import subscribers:
- Go to Subscribers → Add subscribers.
- Choose your method: CSV upload, copy/paste, connect an integration (Shopify, WooCommerce, WordPress, Zapier), or add manually.
- Map your CSV columns to MailerLite fields (email, first name, last name, custom fields).
- Assign to a Group (create one now if needed — e.g., “Main List”).
- Confirm import and review the summary.
🧠 Groups vs Segments — Quick Reference
Use Groups when: you have distinct audiences (customers vs. prospects), different lead magnets, or events with separate attendee lists.
Use Segments when: you want to send based on engagement level, location, or purchase behaviour — without manually moving people between lists.
Step 4: How Do You Create and Send Your First Email Campaign in MailerLite?
MailerLite’s campaign creation flow is genuinely well-designed. You’re never more than 4 screens away from hitting Send. Here’s the exact sequence:
- Go to Campaigns → Create campaign.
- Choose campaign type — Regular (most common), A/B test (Growing Business+), Auto-resend, or RSS. Start with Regular.
- Fill in campaign setup: Campaign name (internal only), email subject line, preview text, sender name, and reply-to email.
- Choose your template. Free plan users start from a blank canvas. Growing Business users access 43+ pre-designed templates.
- Design your email. Add and rearrange content blocks: text, images, buttons, dividers, countdown timers, videos (auto-converted to GIF), surveys. Pull in stock photos from Unsplash directly inside the editor.
- Preview and send a test to yourself before going live. Switch between desktop and mobile preview with one click.
- Choose recipients — select your groups and/or segments.
- Send immediately or schedule for a specific time. Advanced plan users can use Smart Sending to auto-optimise for each subscriber’s timezone.
🎨 Drag-and-Drop Email Editor
Content blocks snap into place without any coding. Add text, images, buttons, countdown timers, YouTube videos (auto-converted to GIF for email clients), and AMP interactive widgets. The editor is responsive by default — mobile layout adjusts automatically.
The short answer: From clicking “Create campaign” to clicking “Send,” most beginners take 15–30 minutes for their first campaign. The editor is genuinely intuitive — if you’ve used a basic page builder before, nothing here will surprise you. The only real friction point: free plan users don’t get templates, which means starting from scratch every time.
Step 5: How Do You Set Up Your First Email Automation in MailerLite?
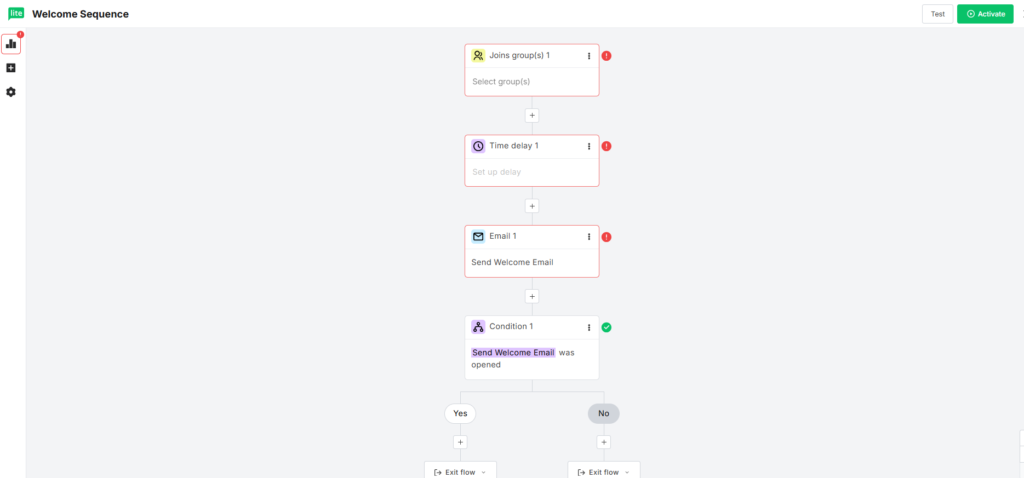
Automation is where MailerLite earns its reputation. The visual workflow builder makes sequences that feel intimidating on other platforms feel simple here — I set up a 4-email welcome sequence in about 20 minutes on my first try.
The most universally useful automation to start with: a welcome sequence triggered when someone subscribes.
- Go to Automations → Create workflow.
- Name your workflow (e.g., “Welcome Sequence — Main List”).
- Select trigger: “Subscriber joins a group” → choose your main subscriber group.
- Click the (+) button below the trigger to add your first step.
- Add “Send email” step → click “Design email” to open the editor and create your welcome email.
- Add a Delay step (optional) → e.g., “Wait 3 days” before the next email.
- Add additional emails following the delay — repeat as needed for a full sequence.
- Click Activate — the workflow runs automatically for every new subscriber from that point forward.
⚙️ 3 Welcome Automation Ideas for Beginners
- Single welcome email: Instant send with your lead magnet, best content, or a simple “thank you” — works on the free plan.
- 3-day drip sequence: Day 0: Welcome + freebie → Day 3: Your best blog post → Day 7: What to expect from the newsletter.
- Engagement check (Advanced plan): Send welcome → Wait 14 days → If they didn’t open: resend with different subject line → If they opened: move to next nurture sequence.
Free plan note: One trigger per workflow. To run multiple triggers simultaneously, you need the Advanced plan (~€17.10/month), which allows up to 3 triggers per workflow.
Step 6: How Do You Build Signup Forms and Landing Pages to Grow Your List?
Your email list only grows if people can actually find a way to subscribe. MailerLite gives you three tools for this: embedded forms, popup forms, and standalone landing pages.
Creating a signup form:
- Go to Forms → Create form.
- Choose type: Embedded (sits inside a page), Popup (appears on trigger), or Promoted (floating bar).
- Design the form using the editor — add/remove fields, style buttons and colours.
- Set which Group subscribers get added to when they submit.
- Enable double opt-in (strongly recommended — keeps your list clean and GDPR-compliant).
- Get the embed code or WordPress plugin snippet → paste into your website.
Creating a landing page: Go to Sites → Create landing page. Choose a template (Growing Business/Advanced), customise text and imagery, connect a form, then publish. Free plan users get 10 landing pages; paid plans get unlimited.
WordPress integration: Install the official MailerLite plugin and connect it with your API key. Forms sync automatically — no copy-pasting embed codes needed.
If MailerLite’s landing page builder feels limited, check out our best landing page builders comparison for dedicated alternatives.
What Are MailerLite’s Biggest Problems — The Honest Downsides
No platform is perfect, and MailerLite has some real issues that other reviews tend to downplay.
- Account approval delays and bans: MailerLite’s review process can be slow and is sometimes opaque. There are reports of accounts being flagged or suspended without clear explanation, even for users who haven’t sent a single email — something I’ve personally encountered. This affects more users than MailerLite’s marketing would suggest.
- No phone support at any tier: Zero. Even Enterprise customers get email and chat only.
- Free plan reduction (September 2025): Cutting from 1,000 to 500 free subscribers felt like a bait-and-switch to users who’d built their early lists there.
- Limited reporting: No bot-click filtering (Apple MPP inflates open rates significantly), and no revenue attribution without third-party integration.
- Price increases: MailerLite raised prices in 2024, with some users reporting increases of 40–50% compared to their legacy plans.
⚠️ Account Suspension Warning
MailerLite has terminated accounts — sometimes without warning — from users who were not spamming. If you’re a cold-email sender or have any unsolicited contact history, do not use MailerLite. Their anti-spam policy is enforced strictly. If your account gets suspended, contact support immediately and be specific about your subscriber acquisition method.
MailerLite Pros and Cons — What Testing Actually Showed
✅ Pros
- Cleanest interface: Four consecutive “Ease of Use” awards (EmailToolTester 2023–2026)
- Strong deliverability: 95.4% inbox placement in latest independent tests
- Generous free plan: 12,000 emails/month vs. Mailchimp’s 1,000/month
- Visual automation builder: Genuinely intuitive — no coding required
- All-in-one toolkit: Email + landing pages + forms + website in one platform
- Excellent pricing: ~€8.55/month Growing Business is among the cheapest in its tier
- GDPR-compliant: EU servers, ISO 27001 certified
❌ Cons
- Strict approval process: Can take days; occasionally flags legitimate accounts
- No phone support at any plan level
- Free plan reduced: 500 subscribers (was 1,000) since September 2025
- No templates on free plan: Must design from scratch
- Basic reporting: No bot-click filtering, no revenue attribution
- Multi-trigger automation = Advanced only: ~€17.10/month required
- Smaller integrations: ~140 native vs. 300+ for Mailchimp
How Does MailerLite Compare to the Alternatives?
Monthly price comparison at 500 subscribers (paid plans)
Prices at 500 subscribers, monthly billing. EUR prices approximate — verify at official pricing pages.
MailerLite sits at the affordable end of the market — only Brevo comes close at the 500-subscriber tier. The main trade-off vs. Mailchimp: fewer integrations and less advanced reporting. The main trade-off vs. GetResponse: no webinars or advanced CRM built in. For a deeper dive, our best email marketing software guide covers 12 platforms head-to-head.
MailerLite Tips: How Do You Get Better Results from Your Campaigns?
- Authenticate your domain first (Step 2 above). Do this before you send anything. It’s the highest-ROI 5 minutes you’ll spend.
- Use double opt-in whenever possible. You’ll get fewer subscribers — they’ll be better ones, with higher open rates and fewer spam complaints.
- Clean your list every 90 days. Remove anyone who hasn’t opened in 180+ days.
- Personalise with first names. Open rates increase 20–30% on average. MailerLite supports dynamic content blocks.
- Send on a consistent schedule. Inconsistent sending damages deliverability and reader trust.
- Test subject lines with A/B tests (Growing Business plan+). Run at least 4 tests before assuming you know what works.
- Don’t ignore the preview text. Write it intentionally — it’s like a second subject line.
- Never import purchased lists. This is the fastest path to account suspension.
Final Verdict: Is MailerLite Worth It in 2026?
After testing it hands-on across free and paid plans, my overall take is straightforward: MailerLite earns its reputation as the most beginner-friendly email platform available in 2026. The interface is genuinely the cleanest in the market, the deliverability is excellent, and the free plan — despite the September 2025 reduction to 500 subscribers — remains among the most generous available.
What I didn’t expect was how capable the automation builder is at the price. A visual workflow builder with delays, conditions, and A/B splits for approximately €8.55/month is legitimately impressive. The downsides are real: the approval process is stricter than competitors, there’s no phone support, and reporting is basic. If you need advanced automation logic or a full CRM, you’ll hit limits quickly.
My recommendation: Start on the free plan. Test everything — the editor, one automation, one landing page. If you’re still using it after 30 days (you probably will be), the Growing Business upgrade is one of the easiest upsell decisions in software. For most newsletter creators and small business owners, that’s where you’ll stay for years.
For a full comparison before you commit, check out our GetResponse vs. Mailchimp breakdown, our email marketing automation guide, and our GetResponse alternatives article if you’re weighing all your options.
Ready to Start Building Your List?
MailerLite’s free plan is genuinely free — 500 subscribers, 12,000 emails/month, no credit card. The 14-day Advanced trial is included at signup so you can test everything before committing.
Free forever · Upgrade anytime · GDPR-compliant
Frequently Asked Questions About MailerLite
📚 Related Reading
- 📊 Best Email Marketing Software 2026 — 12 platforms tested and ranked
- ⚔️ GetResponse vs. Mailchimp — which is better for small businesses?
- 🔄 Email Marketing Automation Guide — how to build sequences that convert
- 🔁 Best Mailchimp Alternatives — cheaper options with better free plans
- 🏗️ Best Landing Page Builders — when you need more than MailerLite’s built-in pages
- 📣 GetResponse Review — the main competitor with webinar features
- 📬 GetResponse vs. Brevo — comparing two European-friendly platforms
- 📧 MailerLite Review 2026 — full platform deep dive
Disclosure: Some links in this article are affiliate links. If you sign up through them, we may earn a commission at no extra cost to you. This doesn’t influence our reviews. Pricing originally verified March 3, 2026 and reviewed May 2026. EUR prices are approximate conversions — always verify at official pricing pages before committing.